


Roof Lantern Comparison for Better UK Specifications
A roof lantern can turn an ordinary flat-roof extension into the brightest room in the house, but visual impact alone is not a specification. A useful roof lantern comparison looks beyond sightlines and colour charts to consider glass, thermal performance, roof build-up, security, drainage and the practical realities of installation.
For installers, builders and developers, getting these details right at quotation stage prevents delays on site and helps deliver a result that performs as well as it looks. For homeowners, it means choosing a feature that adds lasting value rather than simply adding more glass overhead.
What makes a roof lantern different?
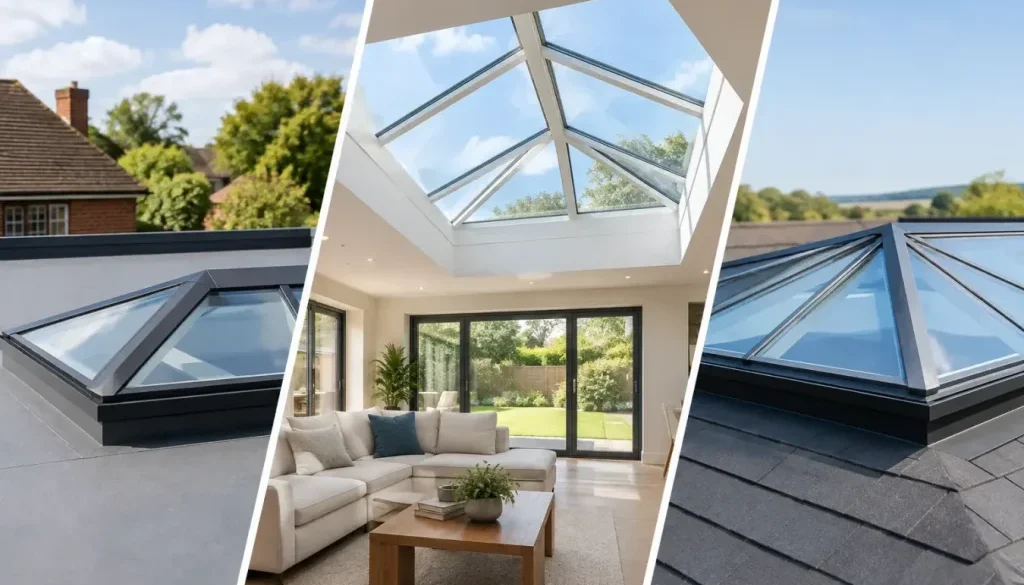
A roof lantern is a raised, multi-panel glazed structure installed on a flat or low-pitched roof. Unlike a fixed flat rooflight, it has a pitched form with slim rafters and a central ridge, creating height as well as bringing daylight deeper into a room.
That shape is the reason roof lanterns suit kitchen extensions, garden rooms, dining spaces and large open-plan renovations so well. Daylight enters from more than one angle, while the elevated design creates an architectural focal point from both inside and outside.
The trade-off is that a lantern has more components than a flat rooflight. Frame design, glazing specification and weathering details therefore deserve closer attention. The right option depends on the opening size, ceiling height, building orientation and the standard expected from the finished project.
Roof lantern comparison: the points that matter
Two products may look similar in a brochure but perform very differently once fitted. Comparing them on a few practical measures gives a clearer view of value.
Frame material and sightlines
Aluminium is the established choice for premium roof lanterns because it is strong, stable and capable of supporting larger glazed areas with narrow profiles. Slimmer rafters allow more of the opening to remain glass, which is particularly valuable where the lantern is intended to be the centrepiece of a contemporary extension.
Strength also matters over time. A properly engineered aluminium system is less prone to the movement associated with temperature changes and can retain crisp joint lines through years of exposure. Powder-coated aluminium offers a durable finish and allows the external colour to coordinate with windows, bifolds, sliding doors and guttering. For a bespoke scheme, access to a wide RAL colour range is a genuine specification advantage rather than a cosmetic extra.
Cheaper systems may use chunkier sections or less refined connections. They can suit budget-led projects, but it is worth checking whether the visible frame proportions match the design intent, especially on smaller lanterns where every millimetre is noticeable.
Glass specification and solar control
The glass does most of the hard work in a roof lantern. It needs to admit useful daylight without making the room uncomfortable in summer or cold near the glazing in winter.
Double-glazed units are often appropriate for standard domestic extensions, provided the overall system has a credible thermal specification. Where a project has a large glazed roof area, faces south or west, or forms part of a high-performance build, solar-control glass should be considered early. It can reduce solar gain and glare while retaining a bright interior.
A lower g-value generally means less solar energy passes through the glass. That can make a major difference in a kitchen or living area that receives direct afternoon sun. However, very strong solar control may slightly alter the appearance of the glass and reduce useful warmth during cooler months. There is no universal best choice – orientation, shading, ventilation and how the room is used should guide the decision.
Laminated inner panes are another point to check. Overhead glazing must be specified safely, and laminated glass helps retain fragments if breakage occurs. Self-cleaning coatings can also be useful on difficult-to-access roof glazing, although they work best when the glass receives sufficient daylight and rainwater to activate the coating and wash away loosened dirt.
Thermal performance in the real roof build-up
A quoted U-value is useful, but only when everyone is clear what it describes. Is it centre-pane glass performance, the glazed unit, or the whole roof lantern system? Whole-system figures provide the more meaningful comparison because they account for the frame and edge details as well as the glass.
The lantern is only one part of the thermal envelope. Its upstand, insulation continuity, roof membrane detailing and internal plasterboard finish all influence the finished result. A high-performing lantern fitted to a poorly insulated or badly detailed kerb will not deliver its full potential.
For trade professionals, the practical approach is to confirm the required performance before ordering, then coordinate the roof build-up with the roofer and building-control requirements. This is particularly important on extensions where the glazed area is significant relative to the floor area.
Roof pitch, size and proportion
Roof lanterns need a suitable pitch to shed rainwater effectively and maintain their intended appearance. The manufacturer’s permitted pitch range should be checked rather than assumed. A lantern that is too shallow may compromise drainage; one that is too tall can look out of proportion on a modest extension.
Size should be led by the room below, not simply the largest opening available. A long, narrow kitchen-diner may benefit from a rectangular lantern aligned with the island or dining table. A square lantern can suit a more central, symmetrical space. On very large openings, consider how many glazing bars will be visible from below and whether the roof structure can support the proposed arrangement.
The internal ceiling recess also matters. A deep reveal can create a dramatic shaft of light, while a shallow detail gives a cleaner, more contemporary transition. Agree this before the roof is constructed, as it affects both appearance and installation access.
Weathering, drainage and installation detail
A roof lantern is exposed on all sides, so dependable weathering is non-negotiable. Look for concealed fixings, well-designed pressure plates, reliable gasket systems and drainage paths that direct water away from the frame. A clean external finish should not come at the expense of serviceability or water management.
The upstand must be level, square and built to the correct dimensions. Even the best-manufactured lantern will be harder to fit and seal properly if the kerb is out of true. Installers should also allow for safe lifting, roof access and glazing sequence before delivery day. Large glass units can require additional labour or mechanical handling, particularly on restricted sites.
A factory-fabricated product with clear installation information reduces avoidable site variables. This is where manufacturer support and sensible lead times can protect the programme, particularly when roof completion is holding up internal works.
Security and compliance are part of the specification
Overhead glazing is not usually viewed in the same way as a ground-floor door, but it should still be specified responsibly. Safety glazing requirements, loadings and location all need consideration. On accessible flat roofs or low-level installations, security may require additional attention.
For commercial and higher-risk projects, architects and contractors should confirm the relevant building regulations, fire strategy and project-specific performance requirements before finalising the rooflight. There is no substitute for checking the system is suitable for the application rather than selecting by appearance alone.
Documentation also matters. Product information, glazing details and thermal data should be readily available for the project file and building-control discussion. Clear evidence is particularly useful where the lantern forms part of a wider package of compliant aluminium glazing.
Choosing between a roof lantern and a flat rooflight
A roof lantern is not automatically the right answer. If the aim is a minimal roofline, a contemporary flat rooflight may provide generous daylight with less visible structure from outside. It can also be a better fit for a low parapet, a roof with planning sensitivities or a design where a lantern would compete with upper-storey windows.
Choose a lantern when the project benefits from height, architectural presence and light from several directions. Choose a flat rooflight when restraint, a flush external appearance or a lower internal projection is the priority. Both can perform well when correctly specified; the better option is the one that supports the architecture and the construction detail.
A practical route to the right choice
Start with the roof opening, orientation and desired internal effect. Then establish the required thermal target, glass safety specification and whether solar control is necessary. From there, confirm the roof pitch, upstand dimensions, colour, glazing layout and installation logistics before the order is placed.
This approach keeps the roof lantern comparison focused on long-term performance rather than headline price alone. A well-specified aluminium lantern should feel considered in every season: bright without excessive glare, thermally efficient, weather-tight and proportionate to the space below.
For projects requiring British-made aluminium glazing, Rhino Aluminium can support trade customers with fabricated rooflight products, technical guidance and a specification-led service. The strongest result comes from treating the lantern as an integral part of the roof design, not a late-stage decorative addition.